The Stamp Market :: Colorful Holiday Tags
Good morning to you! I'm popping in to share some colorful, easy to make holiday tags that feature the Candy Cane Christmas stamps and dies from The Stamp Market.

As we head into the holidays, it seems that life inevitably begins to speed up. Before I know it, it's a week before Christmas and I've got loads of gifts to wrap and little time to do it, let alone make them super-pretty with lots of trimmings and handmade tags. That's why I always like to try and make a bunch of tags before it gets to that point. I still may not have the time to dress up each gift as fancy as I'd like, but at least it will have ribbon and a nice tag.

The Stamp Market knows a thing or two about putting together a great-looking gift, and a tag to go with it. I took tags from several die sets (and some weren't tags at all!), paired them with die cuts from Candy Cane Christmas, as well as various stamped sentiments, and created the beginnings of a nice tag stash. (I'll list all the supplies at the end!)

I started by watercoloring some watercolor paper with a mix of Color Crush dye ink refills and a bit of water. I used the following combinations:
Sweet Blush + Bubble Gum = Light Pink
Bubble Gum + Sweet Blush = Dark Pink
Sweet Blush + Bubble Gum + a hint of Melon Orange = Peach
Sea Glass + a hint of Tropic Teal = Light Aqua
From these sheets I cut out my tags. I even included some Christmas tree tags and took half of this die for the tags that look like gift bags.


After stamping and die cutting handfuls of images from the Candy Cane Christmas collection, I added a couple of them that are die cut from cardstock, as well as some Holiday Greenery die cuts, also from just cardstock.

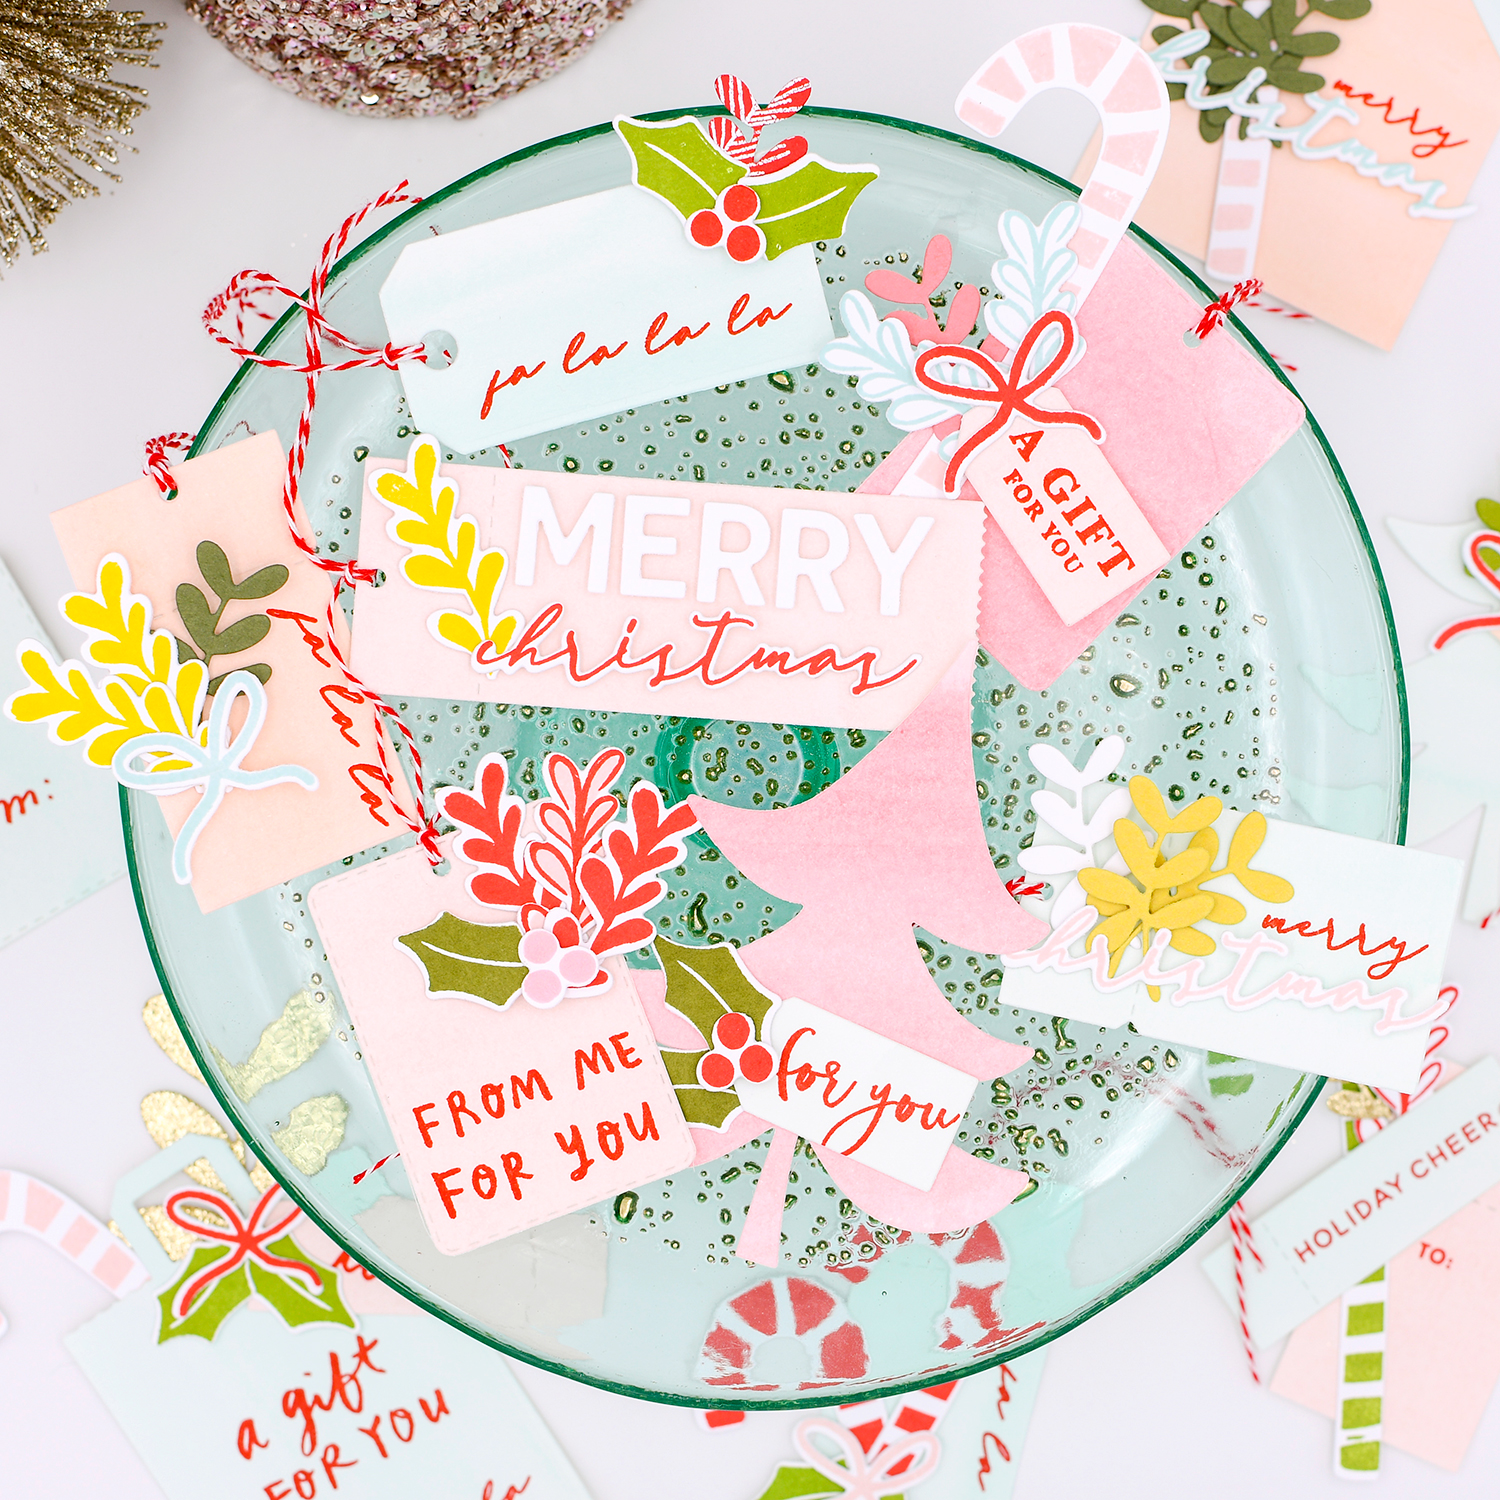
After everything was cut out, I began arranging a few die cuts on each tag, mixing and matching and layering, and making sure that I had room for a sentiment on each tag. In some cases, I've used a smaller, separate tag for that. All of my sentiments are stamped in Cherry Kisses ink--I almost always use black for stamped sentiments, unless I'm embossing, but I wanted these tags to be colorful from start to finish so red ink won out!

I found that the best placement for the die cuts was generally off to one side to allow room for the message or a recipient's name. (Another option is to put the name on the back if there isn't enough room on the front.) I love to leave a few pieces hanging over the side, too.


Finally, I looped some red twine through most of the tags, save for the gift bags and Christmas trees.

I'm off to a great start on holiday gift wrapping with this set of 13 tags! Once the stamping and die cutting is completed, they were relatively quick to assembly-line create yet they're all different. You can even use leftover die cuts from other projects if you have them--I used a couple I had left from a project I made for the release earlier in the month. I hope you've been inspired today!
Supplies:
Stamps: Candy Cane Christmas, Gift Giving Greeting, Bunch of Bows
Ink: Cherry Kisses, Sweet Blush, Sea Glass, Mossy, Leafy, Citrine
Paper: Cherry Kisses, Sweet Blush, Sea Glass, Mossy, Leafy, Citrine, Bubble Gum
Dies: Candy Cane Christmas, Holiday Greenery, Dotted Tree, Gift Bag & Tag, Tag'd, Made With Love, Scalloped Frame
Dye Ink Refills: Cherry Kisses, Sweet Blush, Melon Orange, Sea Glass, Tropic Teal
All supplies from The Stamp Market except red twine & watercolor and glitter paper
The Stamp Market knows a thing or two about putting together a great-looking gift, and a tag to go with it. I took tags from several die sets (and some weren't tags at all!), paired them with die cuts from Candy Cane Christmas, as well as various stamped sentiments, and created the beginnings of a nice tag stash. (I'll list all the supplies at the end!)
I started by watercoloring some watercolor paper with a mix of Color Crush dye ink refills and a bit of water. I used the following combinations:
Sweet Blush + Bubble Gum = Light Pink
Bubble Gum + Sweet Blush = Dark Pink
Sweet Blush + Bubble Gum + a hint of Melon Orange = Peach
Sea Glass + a hint of Tropic Teal = Light Aqua
From these sheets I cut out my tags. I even included some Christmas tree tags and took half of this die for the tags that look like gift bags.
After everything was cut out, I began arranging a few die cuts on each tag, mixing and matching and layering, and making sure that I had room for a sentiment on each tag. In some cases, I've used a smaller, separate tag for that. All of my sentiments are stamped in Cherry Kisses ink--I almost always use black for stamped sentiments, unless I'm embossing, but I wanted these tags to be colorful from start to finish so red ink won out!
I found that the best placement for the die cuts was generally off to one side to allow room for the message or a recipient's name. (Another option is to put the name on the back if there isn't enough room on the front.) I love to leave a few pieces hanging over the side, too.
I'm off to a great start on holiday gift wrapping with this set of 13 tags! Once the stamping and die cutting is completed, they were relatively quick to assembly-line create yet they're all different. You can even use leftover die cuts from other projects if you have them--I used a couple I had left from a project I made for the release earlier in the month. I hope you've been inspired today!
Supplies:
Stamps: Candy Cane Christmas, Gift Giving Greeting, Bunch of Bows
Ink: Cherry Kisses, Sweet Blush, Sea Glass, Mossy, Leafy, Citrine
Paper: Cherry Kisses, Sweet Blush, Sea Glass, Mossy, Leafy, Citrine, Bubble Gum
Dies: Candy Cane Christmas, Holiday Greenery, Dotted Tree, Gift Bag & Tag, Tag'd, Made With Love, Scalloped Frame
Dye Ink Refills: Cherry Kisses, Sweet Blush, Melon Orange, Sea Glass, Tropic Teal
All supplies from The Stamp Market except red twine & watercolor and glitter paper
Comments
Post a Comment
i do appreciate your comment!
~Rebecca