Ink to Paper :: January 2020 Release :: Day Four

We made it to day 4 of Ink to Paper's January release introductions and there are some gorgeous sets today! I've got 3 projects to share with you today and there's plenty more to see on the ITP blog. Don't forget that all new items will be available in the ITP shop tomorrow night (the 15th) at 10pm EST.

My main idea for my first card was to think beyond what was presented to me: For instance, just because dies are in a set of Birthday sentiments doesn't mean they all have to be used exclusively for birthdays! This card was all about celebrating something special and it can be used for a birthday, of course, but it's also suited for many celebratory occasions like Mother's Day, a wedding, anniversary, or a big achievement. And even though the little die cut florals didn't come with the bouquet they're used with, they look so pretty dotted around the leaves and stems just the same. And why not take a an itty bitty 3-dot stamp and turn it into a custom background? That's what makes card-making so special--thinking outside the box and having a whole lot of fun doing it!

Tips:
1. Use the Skinny Frame with patterned paper to add some excitement to this die staple.
2. A solid background surface underneath a die cut sentiment like the Autumn Rose banner enhances the word and draws attention to it, especially when the colors contrast.

3. One of the easiest ways to create subtle dimension is by choosing strategic areas to place adhesive. I only adhered the 'celebrate' die cut in the middle of the word. It's firmly in place, but in this case, allowing the first and last letters of the word to naturally curl up nicely mimics the entire card design, where the bouquet leaves and stems curl up naturally, too.

Supplies:
Stamps: Birthday Bouquet, Simply Sweet: Blessed
Ink: Aqua Mist, True Black
Paper: Autumn Rose, Tropical Teal, Luxe Silver, White, American Crafts patterned paper
Dies: To Die For Sentiments: Birthday, Border Bling: Skinny Frame, Birthday Bouquet, Sweet Celebrations, Banner Builder: Basics
Other: crystal droplets, silver thread

Birthdays are meant to be fun and what better way to show this than by using lively, bright colors and confetti? A border of embossed white Sprinkles Galore on a kraft background enhances the colors and lets your recipient know you're ready to celebrate with them and have a good time! This can easily be turned into a more masculine card by simply switching out the Sweet Blush for a different cardstock color--easy!

Tips:
1. Stagger the 'Birthday Wishes' die cuts on top of each other in multiple colors for a rainbow effect.
2. Double frame the sentiment with a Border Bling skinny frame and a border of embossed sprinkles stamped around the card edges.
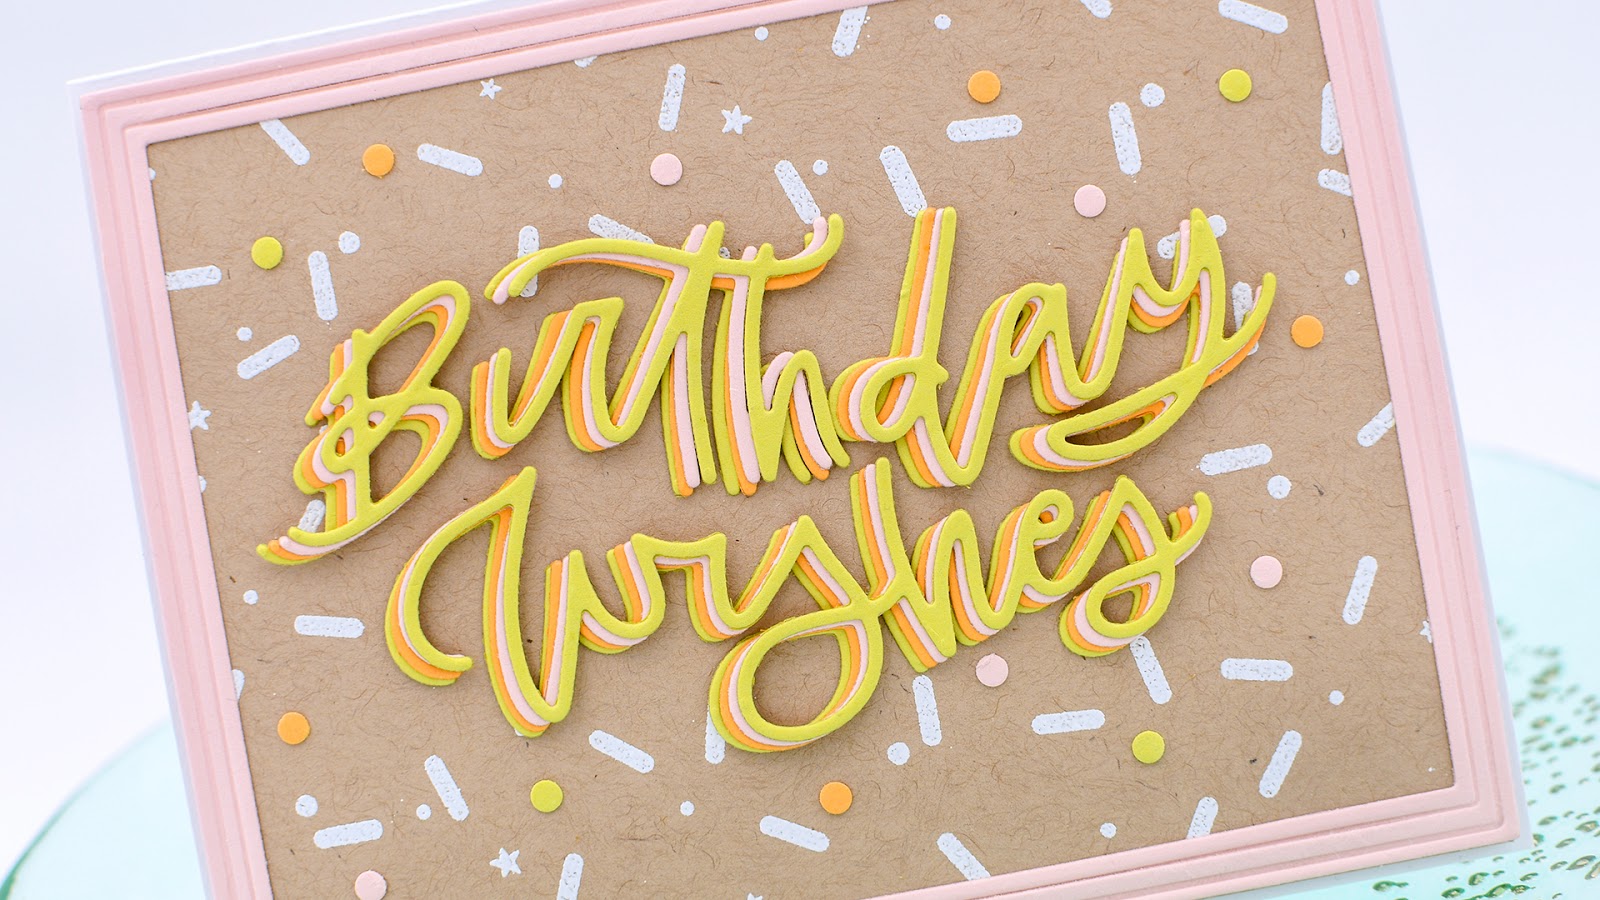
3. Achieve extra color pops with a 1/8" hole punch and matching cardstock. Simply adhere the punch-outs to fill in empty spaces.

Supplies:
Stamps: Sprinkles Galore
Ink: Watermark
Paper: Sweet Blush, Limeade Ice, Summer Sunrise, Classic Kraft, White
Dies: To Die For Sentiments: Birthday, Border Bling: Embossed Skinny Frame
Other: white embossing powder, 1/8" hole punch

Patterned paper has long been one of my favorite craft supplies and the fun thing about stamping is that you have the ability to create your own designs. Earlier in the January release I made a card where I stamped the florals from It's A Sign: Birthday Sentiments to make a background panel and I loved the result. While I was playing around with ideas for my cards today, I tested a leftover piece against the 'Happy Birthday' die cut and thought it was almost perfect--almost because I wanted to change the colors and I needed a bigger piece to make a Border Bling frame from it. It's the same idea--a stamped background--but executed differently. It's okay to borrow your own ideas sometimes!

Tips:
1. Use the Border Bling Skinny frame dies with the wider Border Bling dies for extra variations within the frames.
2. With the To Die For sentiments, leave the interior pieces of the letters intact for a bolder appearance (like in the H, B, and Ys, etc.). This has the added benefit of making them easier to adhere with wider areas to apply adhesive. You can even try filling them in with a different color cardstock if it suits your card design.

3. The open interior of the frame makes a nice spot for the sentiment; the subtlety of the lace pattern offers texture, but the fine lines of the die cut aren't lost in it.

Supplies:
Stamps: It's A Sign: Birthday Sentiments, Birthday Bouquet
Ink: Berry Sorbet, Melon Berry, Dark Indigo, Limeade Ice, Watermark
Paper: Dark Indigo, Melon Berry, Limeade Ice, White
Dies: To Die For Sentiments: Birthday, Border Bling: Skinny Frame, Border Bling: Frame, Border Bling: Stitched
Other: white embossing powder, lace
Thanks so much for being here with me this week--I hope you were inspired either by me or by the other Ink to Paper designers. Enjoy the rest of your week!
Love your re- thinking process about the dies & stamps, good advice. Your Celebrate card is really beautiful!!
ReplyDelete