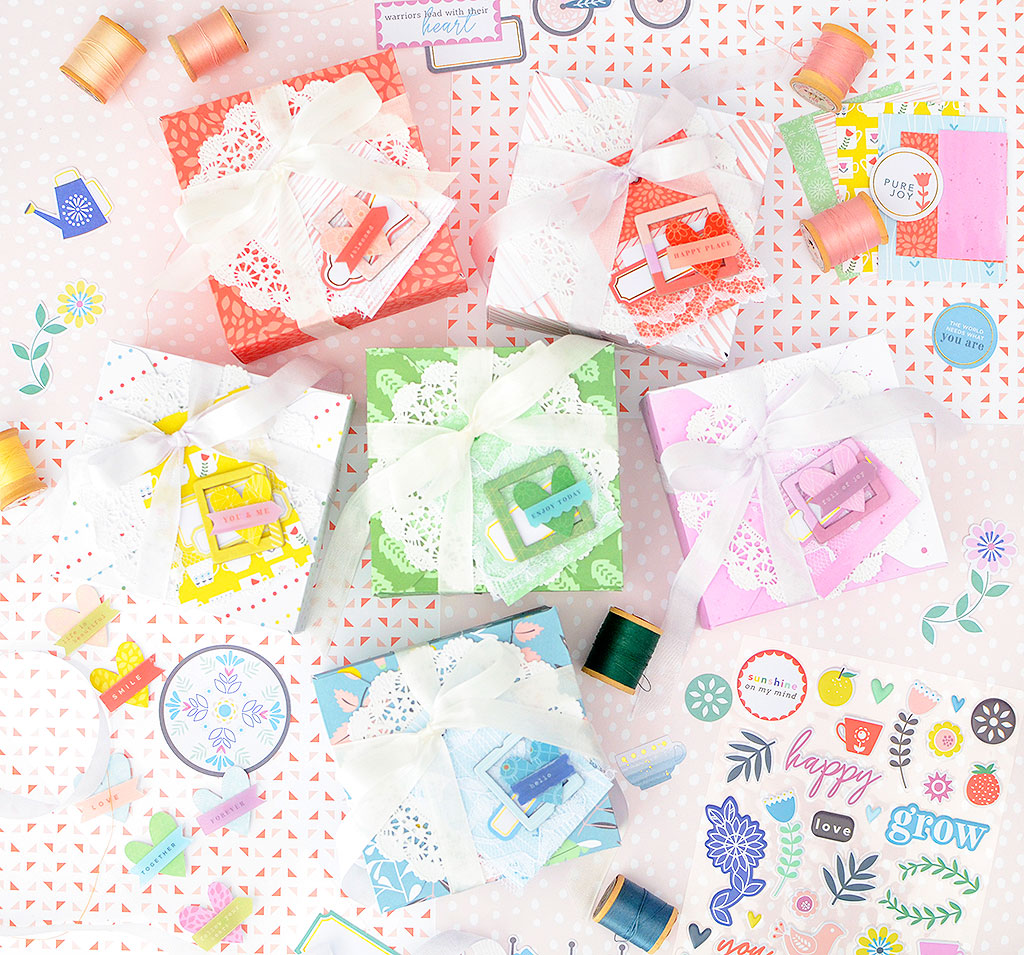
Pinkfresh Studio :: Rainbow Boxes
Hello all! I hope everything is all happy days and rainbows for you...and if it's not, allow me to inject a bit of those into your life.
Pinkfresh Studio always has some of the most beautiful papers and since I love to gift wrap, I love to turn them into gift boxes. Usually, the gift wrap and box come before the tags, but this time, it was the other way around. After my PF project last month, using the Everyday Musings collection, I had some paper scraps leftover and I decided to create another set of colorful tags with them. However, this time, I gathered up embellishments in ALL the colors for a rainbow color scheme.
For the individual tags, I tried to stick to the same family of colors--reds, pinks, yellows, greens, blues, and purples. There are stickers, chipboard frames and embellished hearts.
I cut each tag down to 2 1/4" W x 3" H, then attached a like-colored eyelet to each one. The papers I used are from the 6x6 paper pad: Present & Perfect (mint), Good Times (pink stripe), Time for Fun (red), Sweet Escape (purple), Full of Joy (yellow), and Beautiful (blue).
I searched through the Everyday Musings collection to pick out similar items for each color I was using. This project was very much inspired by the layered heart stickers and I knew I wanted to make them the focal point of each tag.
Small labels and chipboard frames make great elements for layering. The labels are simple, but have nice lines and a little bit of a gold touch to them. The frames have a subtle design and are empty in the middle, which is perfect for being able to see part of the label, and also for adhering the hearts, which are 3-dimensional.
Every tag has a different make up yet they're similar enough to form a matching set. I added bits of lace for extra texture, too.
To create the boxes, I used the 1-2-3 Punchboard by We R Memory Keepers, and followed instructions for the 4" x 4" x 1 3/4" box, which meant cutting down each 12x12 paper into a 9" square.
I thought about using the larger versions of the tag bases for the boxes, but there wasn't enough contrast and the tags blended in too well to be seen against them. So I went for contrast instead. Some colors had darker patterns I could use, like using the dark green Happy Place to go with the mint tag and Good Times for the blue. I partner-swapped Time for Fun and Good Times (reverse side) for the pink and red tags. For purple, I used the same paper (Sweet Escape), but was able to capitalize on the white area of it. The hardest tag to match up was Full of Joy but since it has pops of many of the other colors in the mugs, I paired it up with the dotted reverse side of Present & Perfect.
I assembled each box, added a 4" doily, and some light colored seam binding, then attached the tags, again wanting the tag to be the standout element on each little gift.
These would make such cute party favors, or fill with some sweet treats and give to friends and teachers. All this colorful goodness will surely brighten anyone's day!
I also wanted to share this sweet card I made with some stamps and a couple items from the new Joyful Day line. These are some of my favorite colors right now, and everything about Joyful Day makes me swoon! I took a piece of Small Beginnings paper from the 6x6 pad, trimmed it down to a 3 3/4" square, and matted it onto a deep yellow 4" card base.
In the center is a swatch of lace an "oh happy day" puffy sticker. All around the sticker I layered stamped images of branches and stems. The stamps and dies are from the Make a Wish and Embroidered Blossoms sets.
I carefully laid out the design I wanted, then attached each piece with a small glue dot in order to retain the 3-dimensional appearance. Simple, sweet cards like this are my favorite sort to make and I hope they are well-received, too.
Thank you so much for sharing this happy day with me!


Splendid ideas, Rebecca! I'll try this out today and post it on Instagram.
ReplyDelete