Papertrey Ink :: Design Team Tips :: Mini Card Inspiration
Hello! I get to take a crack at the Papertrey Ink Design Team Tips post today and I'm so excited about that! I've been having a bout with the crafting version of writer's block lately and find myself struggling when it's time to create. It's been going on for a few weeks now and I'm trying hard (maybe too hard?) to get back to more productive days. When I'm stuck for card ideas, I like to make a few mini cards to get the ideas flowing again. There isn't as much space to fill with them so it's okay for them to be very simple, with just a handful of elements, and those elements are often leftovers from previous crafting sessions. For my DT Tips today, I'm showing you how a few leftovers inspired a set of 4 mini cards!

Mini cards and leftovers, honestly, are lifesavers for me! I've been making lots of mini cards as of late, and with all of these struggles to make something I'm happy with going on, I'm ending up with a lot of leftovers. I had several of the Shape Shifters: Oval 4 ovals cut out, as well as a bunch of tassels from Worth the Wait stamped and die cut from a craft session last week that amounted to zilch in the way of producing anything useable. And let me be clear--it's my mind on the fritz, NOT the products!

I had some 8 1/2" x 2 3/4" Melon Berry and Hibiscus Burst cardstock strips that were also leftover from a long-ago project and I finally decided that I'd fold those in half and putter around with some quick minis. Lo and behold, I loved the results, and it turned into the perfect DT Tips project!

The heart-bordered ovals I had already cut were colored and I did change my mind about those, opting to cut a new one out of white instead. I folded it in half, as well, and slipped it over the front of a mini card. Note that these cards open on the side, not the bottom. After playing around with the placement of the oval and the die cut tassels, I added some ribbon scraps to the mix and searched through my stash to see if I had any pre-cut sentiments. There was a "you are so loved" phrase from the Together Forever Blooms set, stamped in Pure Poppy. Although I ended up re-doing it in Hibiscus Burst later on, it was just the kind of thing I needed to see the picture forming.

Don't be afraid to play around with the leftovers that you've got on hand, even if they're not the right color. Trying them out might at least be a step in the right direction to your final destination. That's essentially how this whole set of 4 cards came together--just by trying. After settling on the stamps, dies, and other textures I wanted to use on the card, I could change the colors if I wanted to.

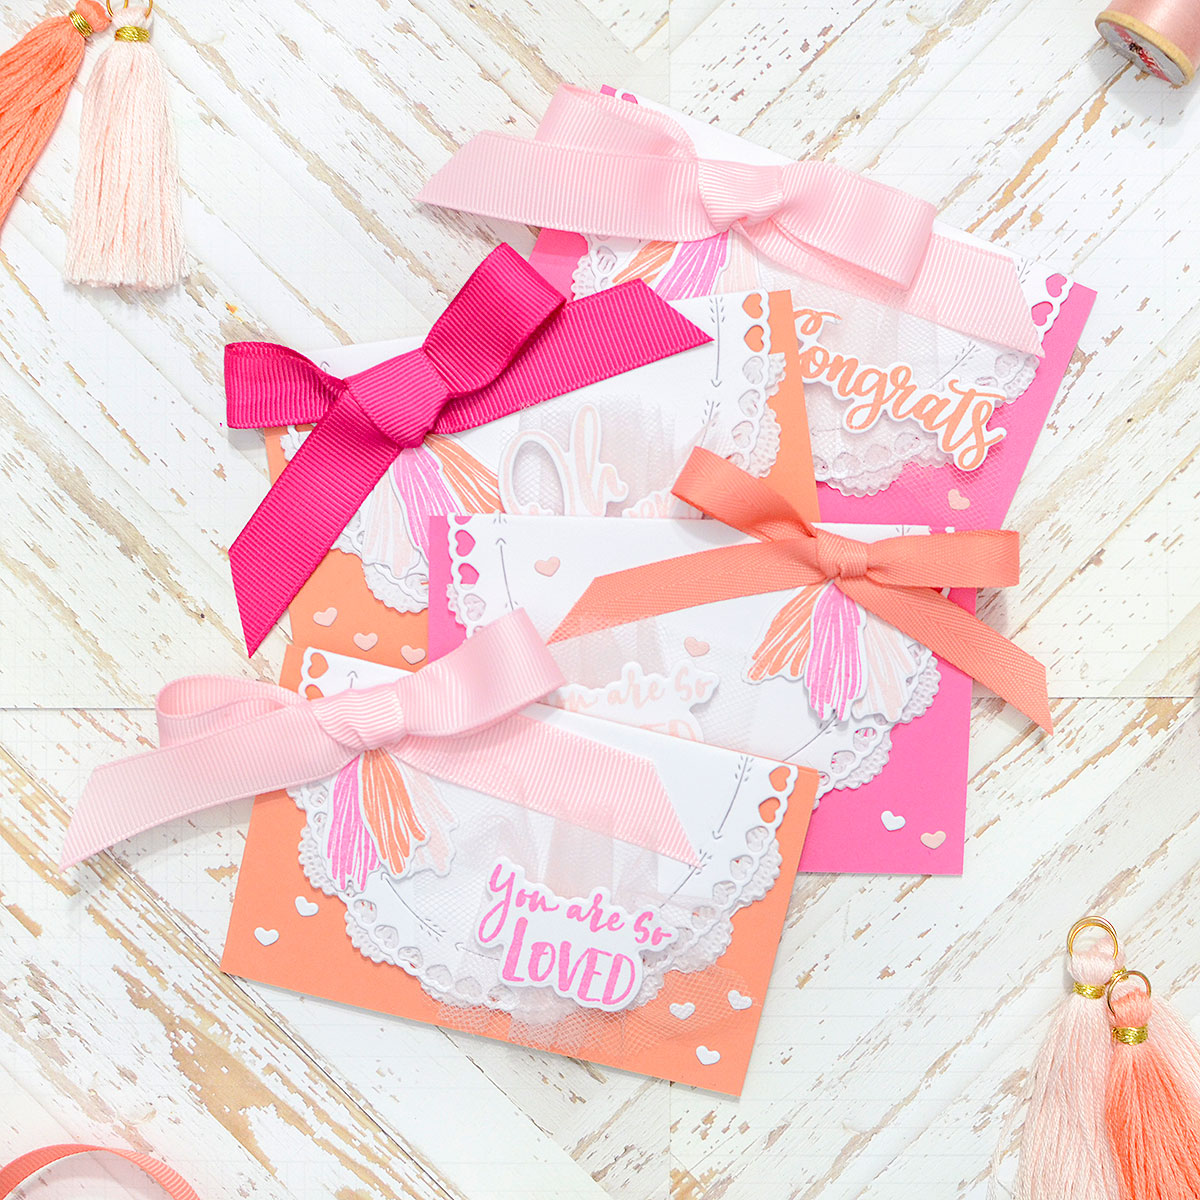
The tassels I'd stamped were Melon Berry, Sweet Blush, and Hibiscus Burst, which were perfect. Once I had that palette down, the rest came together pretty easily. I added a folded white doily underneath the Oval SS for some texture. I made a bow out of Sweet Blush grosgrain ribbon and tucked the tassel tops underneath it. I gathered a little pale pink tulle under the "you are so loved" die cut. I even used a few of the itty bitty white negative hearts from the Oval die cut in the bottom corners of the card. Now I had something I loved!

From there, I wanted to make more--which was a good sign!--so I chose a few more sentiments that worked, including a Melon Berry 'Congrats' that was a leftover! With this set, I thought the best approach was to keep most elements similar and just switch the colors around. That's mostly what I've done here, and that's another helpful tip when you're feeling sluggish. I didn't try to push myself to come up with 4 completely different cards, and therefore, I didn't set myself for the frustration of overdoing it or failure. Just keep it simple!

This was definitely a positive craft session, and those have been few and far between lately. I know I'll get my mojo back eventually, and this really helped me--I have 4 cute cards for multiple occasions now, as well as a fallback exercise if my creativity decides to extend its break. I'll just use my leftover bits and bobs to make a few minis!

Thank you so much for stopping by today--I hope this helps you get un-stuck. And if you aren't stuck, well, maybe you'll give the minis a try anyhow!

Supplies:
Stamps: Worth the Wait, Together Forever Blooms, Circle of Love
Ink: Melon Berry, Sweet Blush, Hibiscus Burst
Paper: Melon Berry, Hibiscus Burst, Sweet Blush, Stamper's Select White
Dies: Worth the Wait, Together Forever Blooms, Circle of Love, Shape Shifters: Oval 4
Other: Sweet Blush Grosgrain Ribbon, Raspberry Fizz Grosgrain Ribbon, Melon Berry Twill Ribbon
I put any "leftover" pieces from a card in the storage envelope with the stamp set and rarely ever use them. But these lovely mini cards you created have changed my mind and I need to set up a spot to keep my leftovers. I can sure see how they can spark creativity. Thanks for the inspiration!
ReplyDeleteHi Rebecca! I’m sorry this is a late comment. I was stunned when the designers left Papertrey and haven’t recovered. It’s hit me harder than I ever expected. I thought I’d check the blog this morning and wow, your cards are so pretty!! Seriously! You’ve endeared me with your honest story and I can totally relate! Your suggestion to make some mini cards is something I will remember. I’ve had a block many times and like you, I hang on to my leftovers. But I also wanted to share, that I’ve looked at some of your work in the past for other companies, and Rebecca, you are so talented! Actually some of my favorites are your cards. Your work for Pinkfresh and Alexander Renke , as well as your BEAUTIFUL packaging really stand out. Thank you for sharing your story and your stunning creations. My VERY best to you ! 😊
ReplyDelete